Upgrading from Single Tenant to Multitenant
This procedure describes how to upgrade from Single tenant to Multitenant setup.
Guest user login is not supported for both Main Tenant and external tenant guest users once multitenancy is enabled in this procedure.
| ➢ | To reconfigure a single tenant setup to multitenant: |
| 1. | Login to the Azure portal as Global Administrator. |
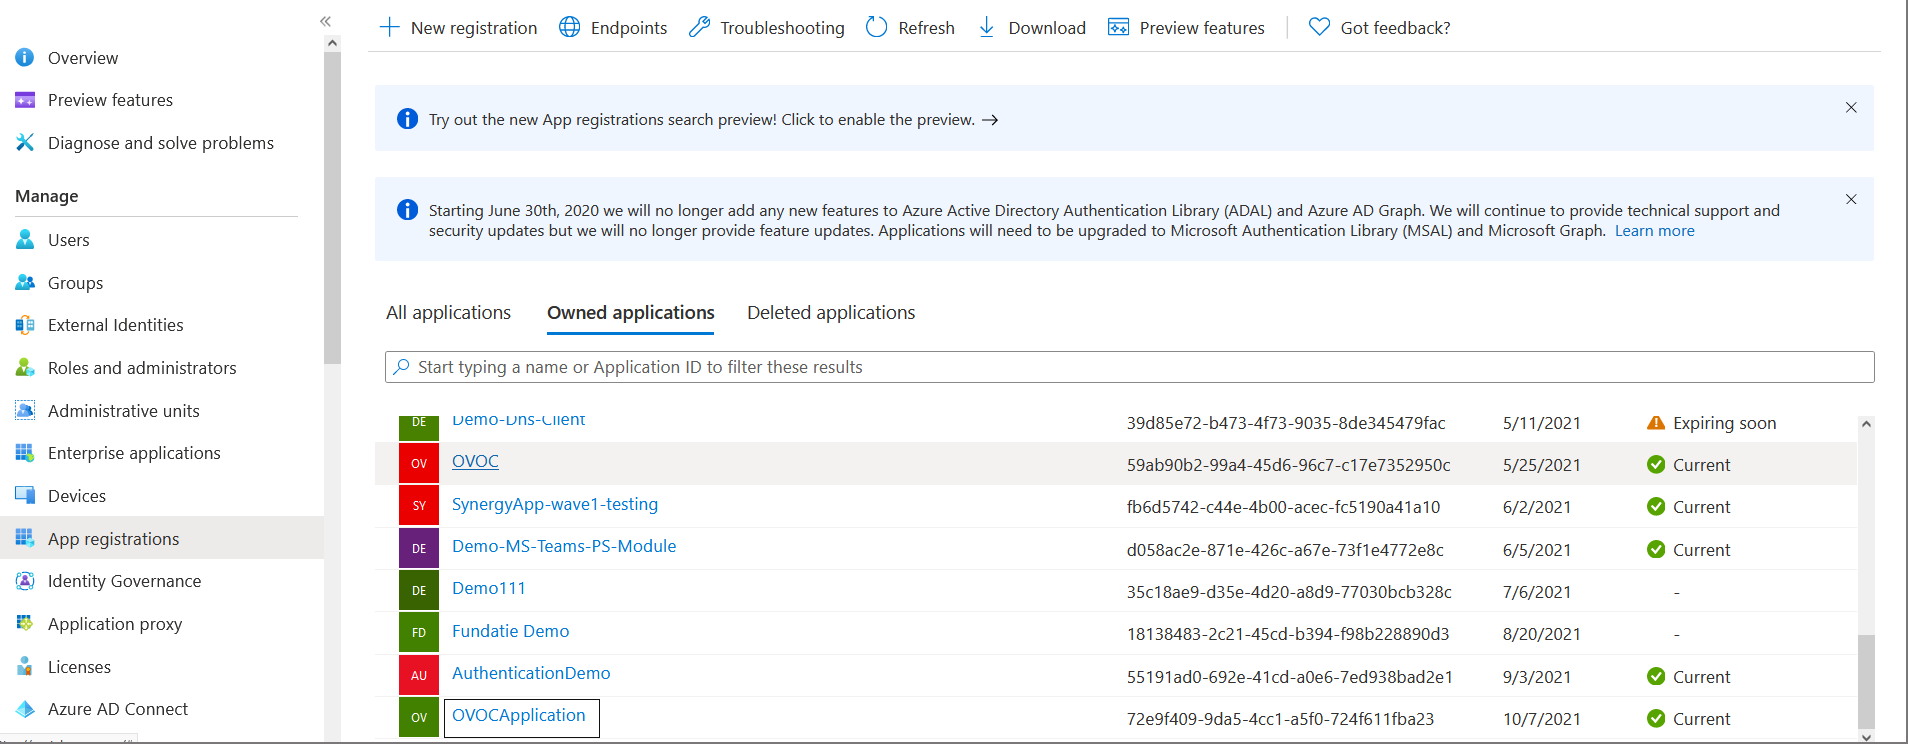
| 2. | In the Navigation pane, select App registrations and select the registered OVOC application (the example used in this section "OVOCApplication" is selected below). |
App registrations
| 3. | In the Navigation pane, select Authentication. |
OVOC Application
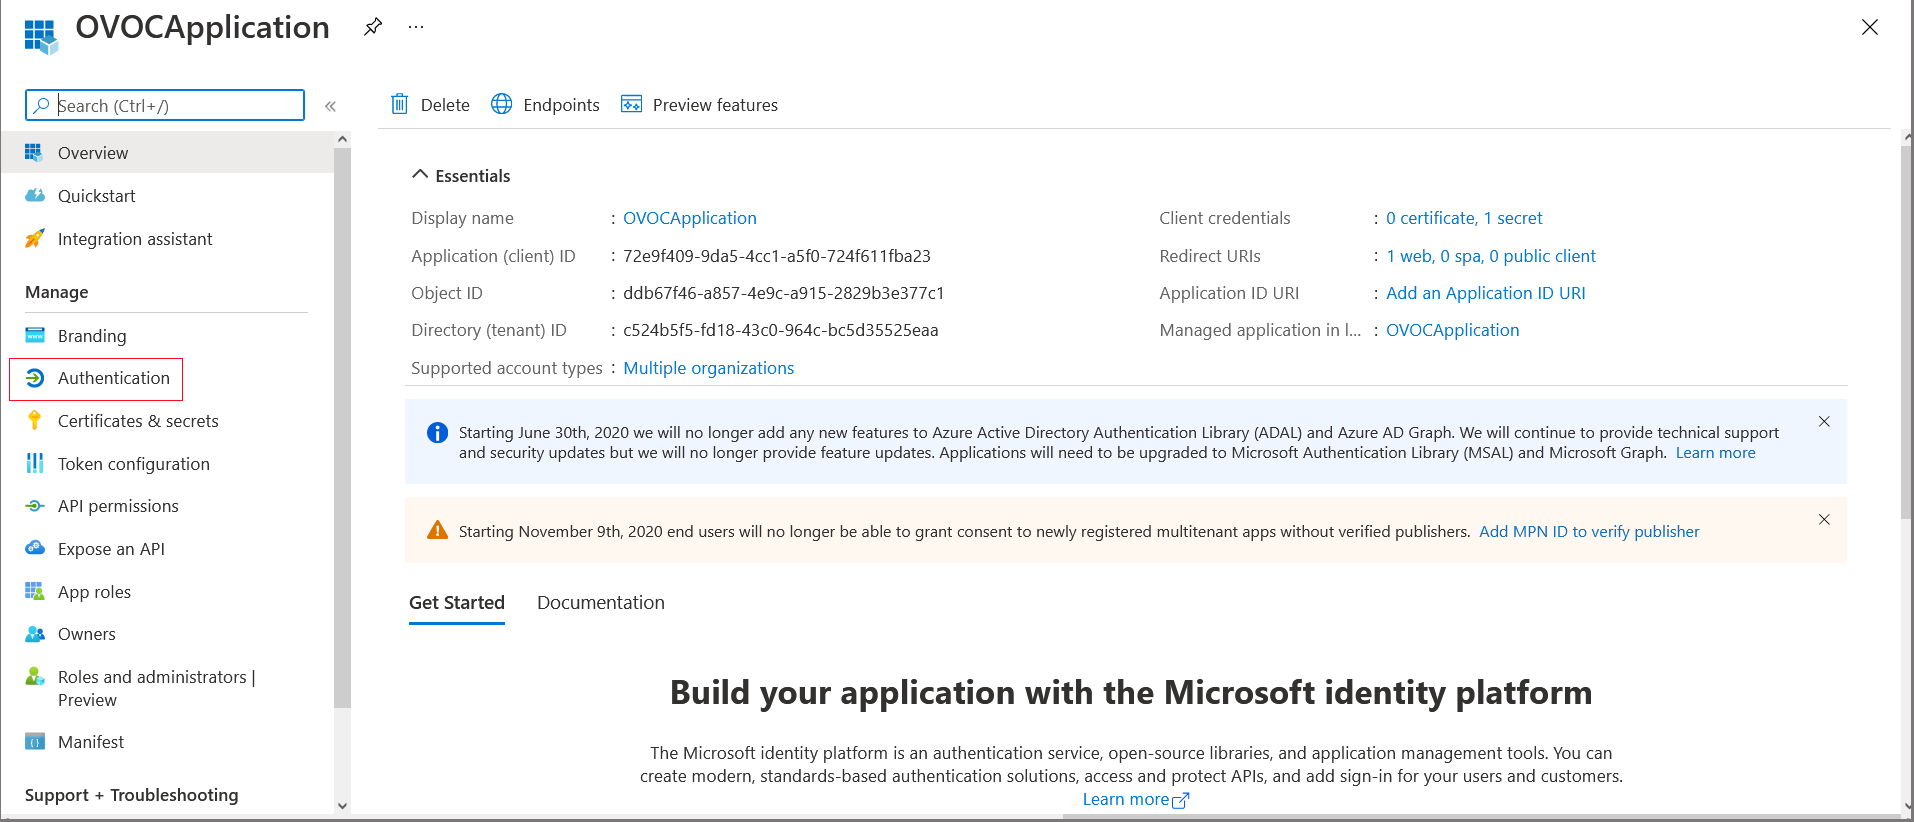
Authentication Screen
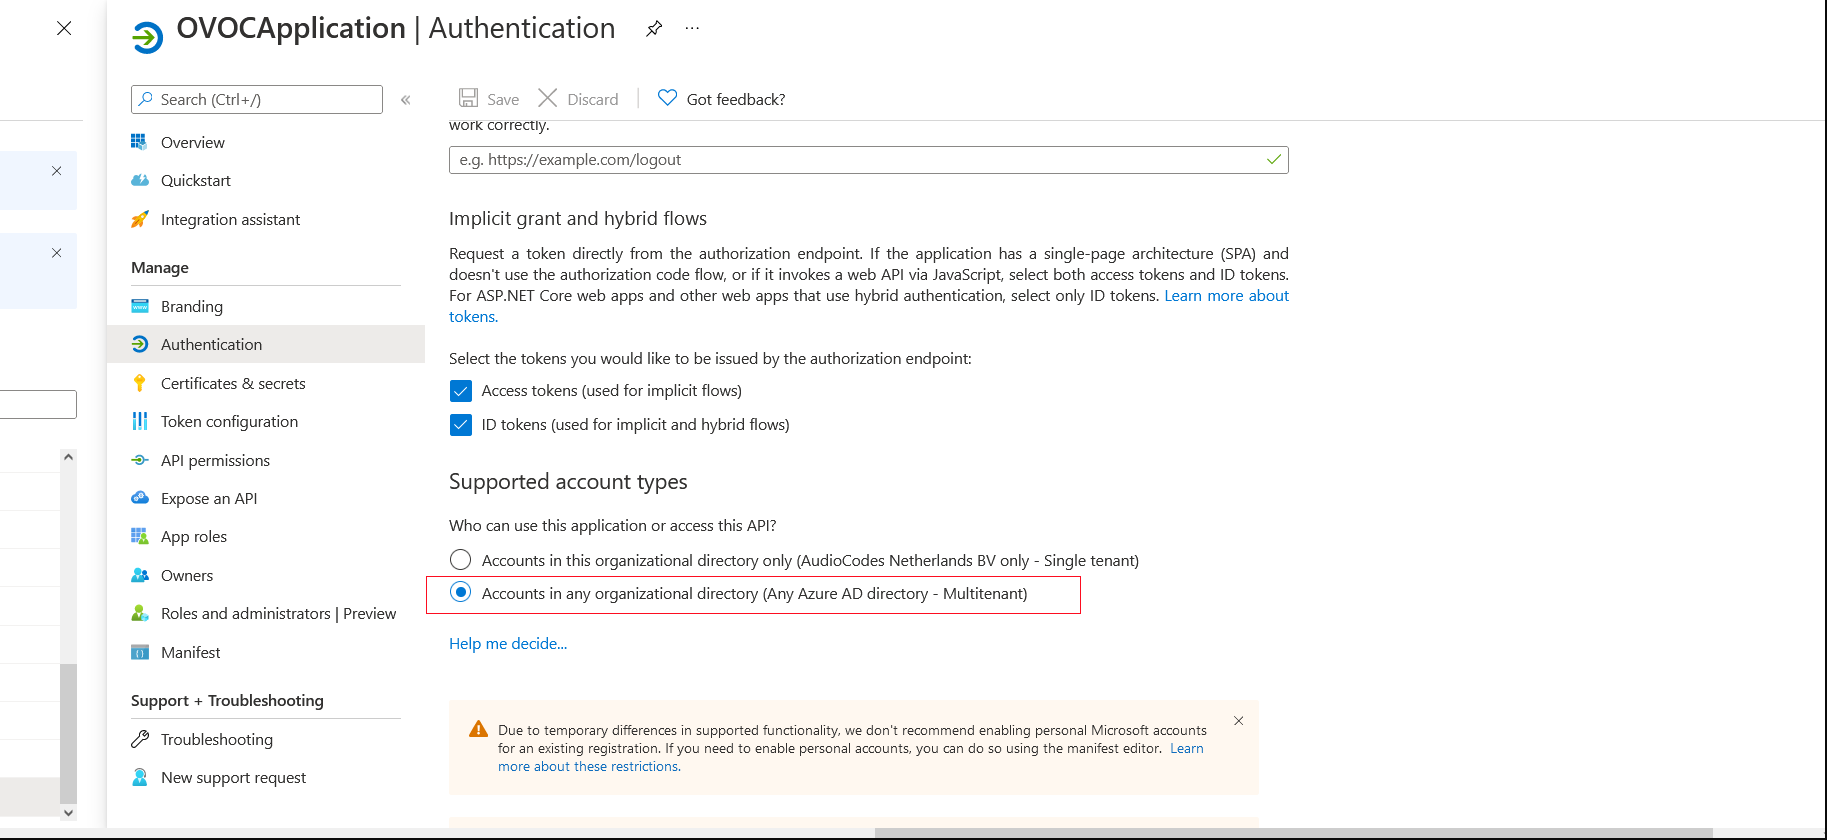
| 4. | Under account types, select Accounts in any organizational directory (Any Azure AD directory - Multitenant) and then click Save. |
| 5. | In the Navigation pane, select Token configuration |
Token Configuration-Add
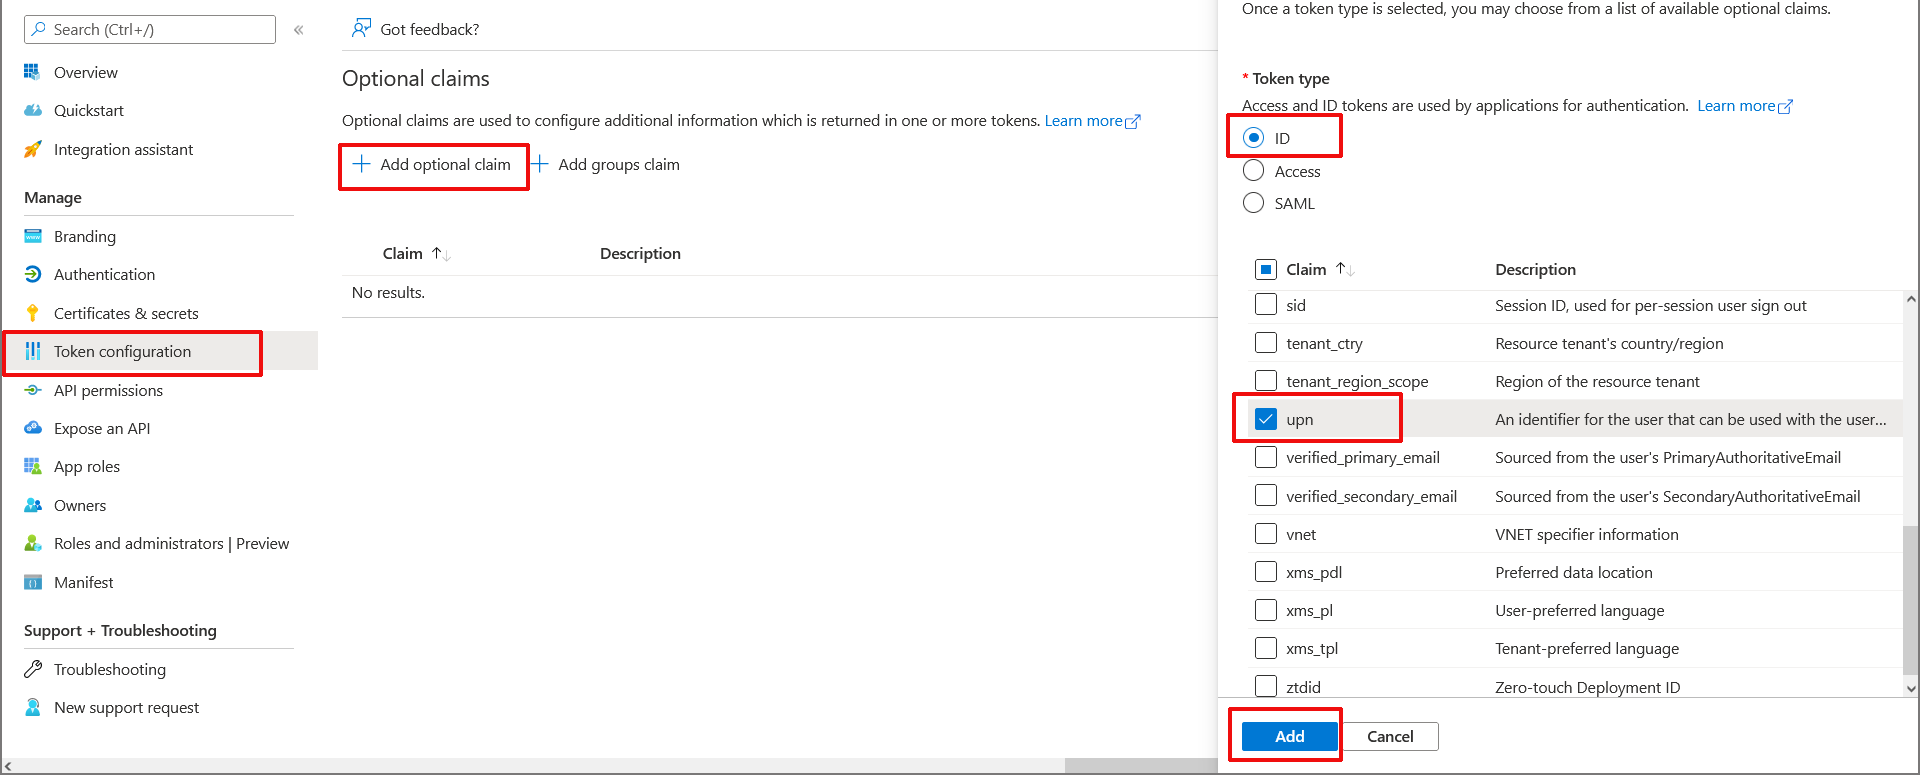
| 6. | Click Add optional claim, choose ID type then upn optional claim and click Add to confirm. |
Turn on Profile Permission
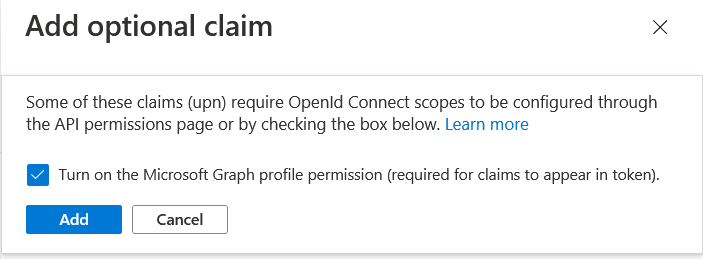
| 7. | Select the Turn on the Microsoft Graph profile permission check box and then click Add. This adds the Profile permission to the API permissions list. |
Optional claims Added

| 8. | In the Navigation pane, select API permissions. |
API Permissions
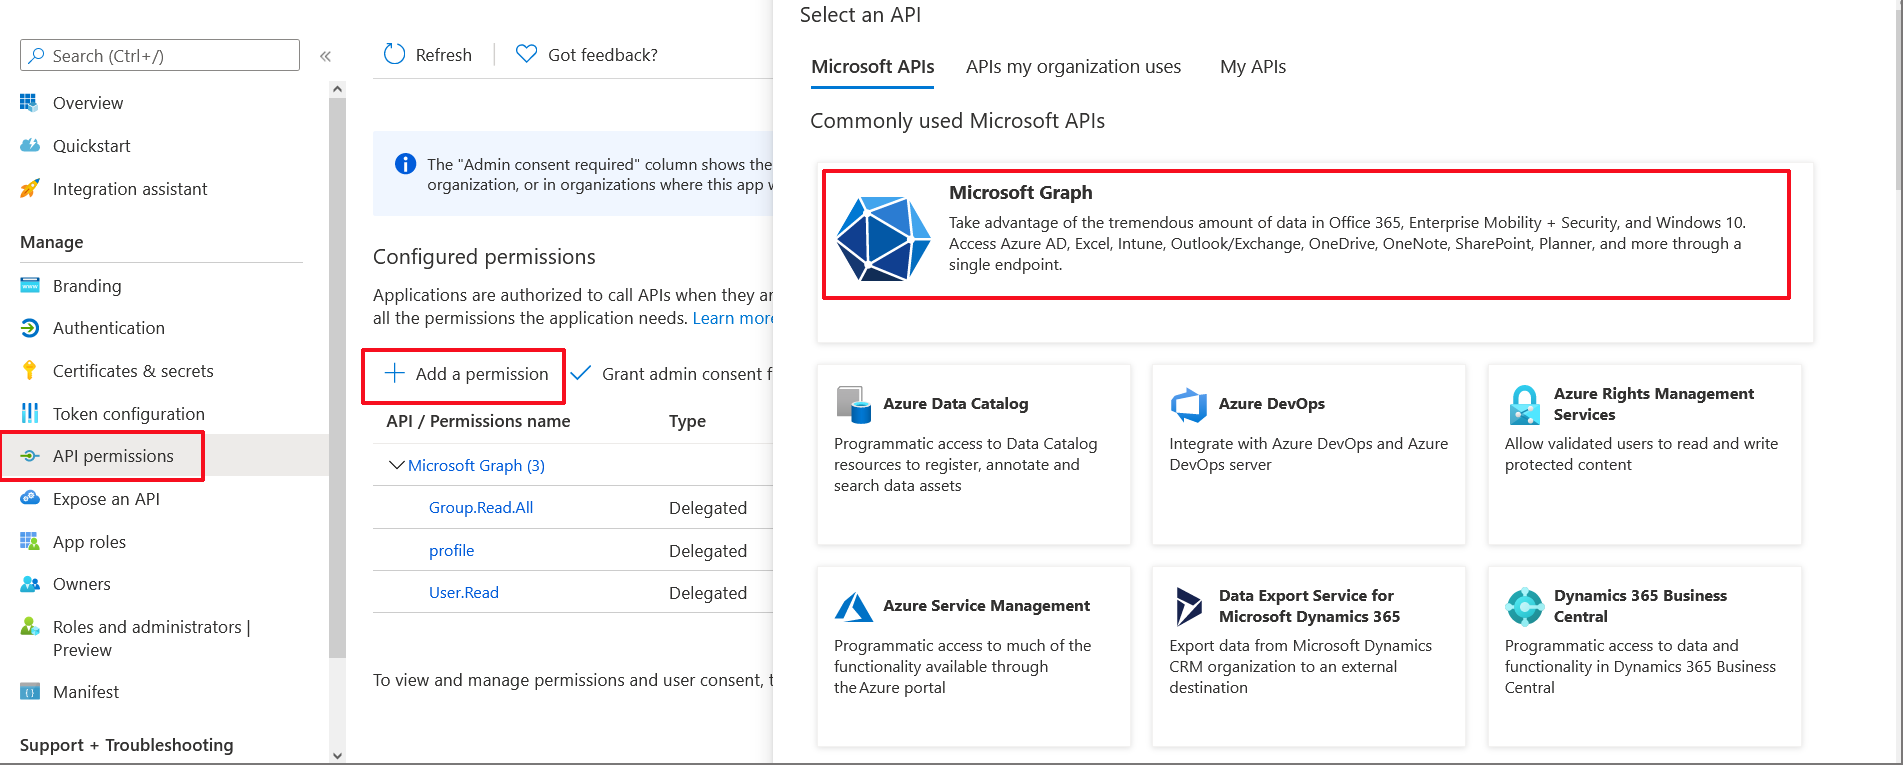
| 9. | Click Add a permission and then click the Microsoft Graph link. |
Delegated permissions
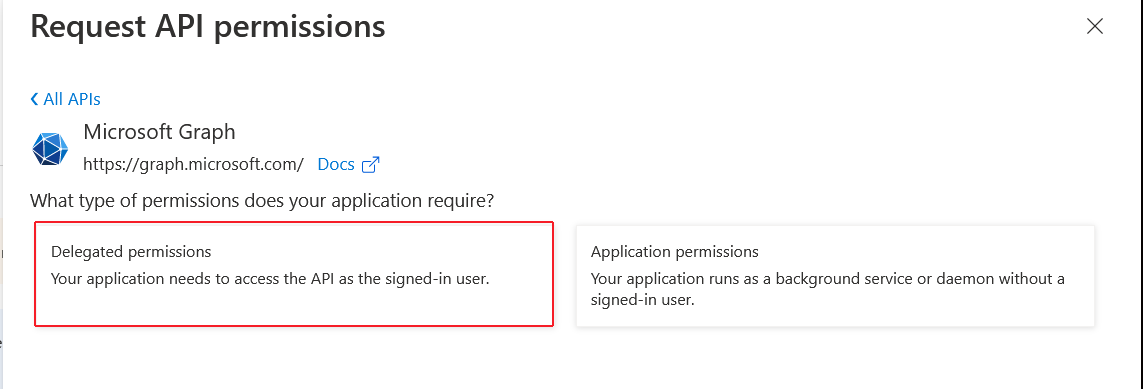
| 10. | Click Delegated permissions. |
Microsoft Graph Permissions
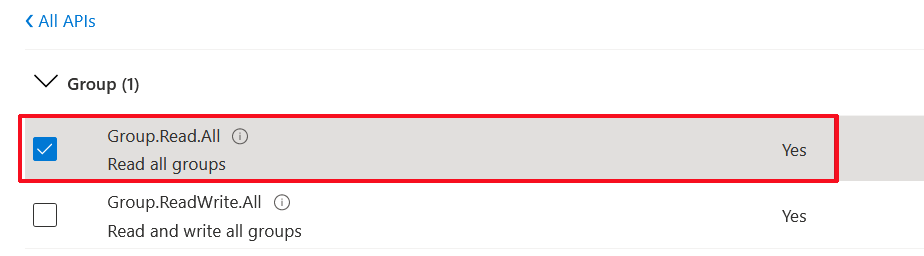
| 11. | Select permission Group.Read.All and then click Add permission. |
| 12. | Add another Delegated permission User.Read.All and then click Add permissons. |
Delegated permissions

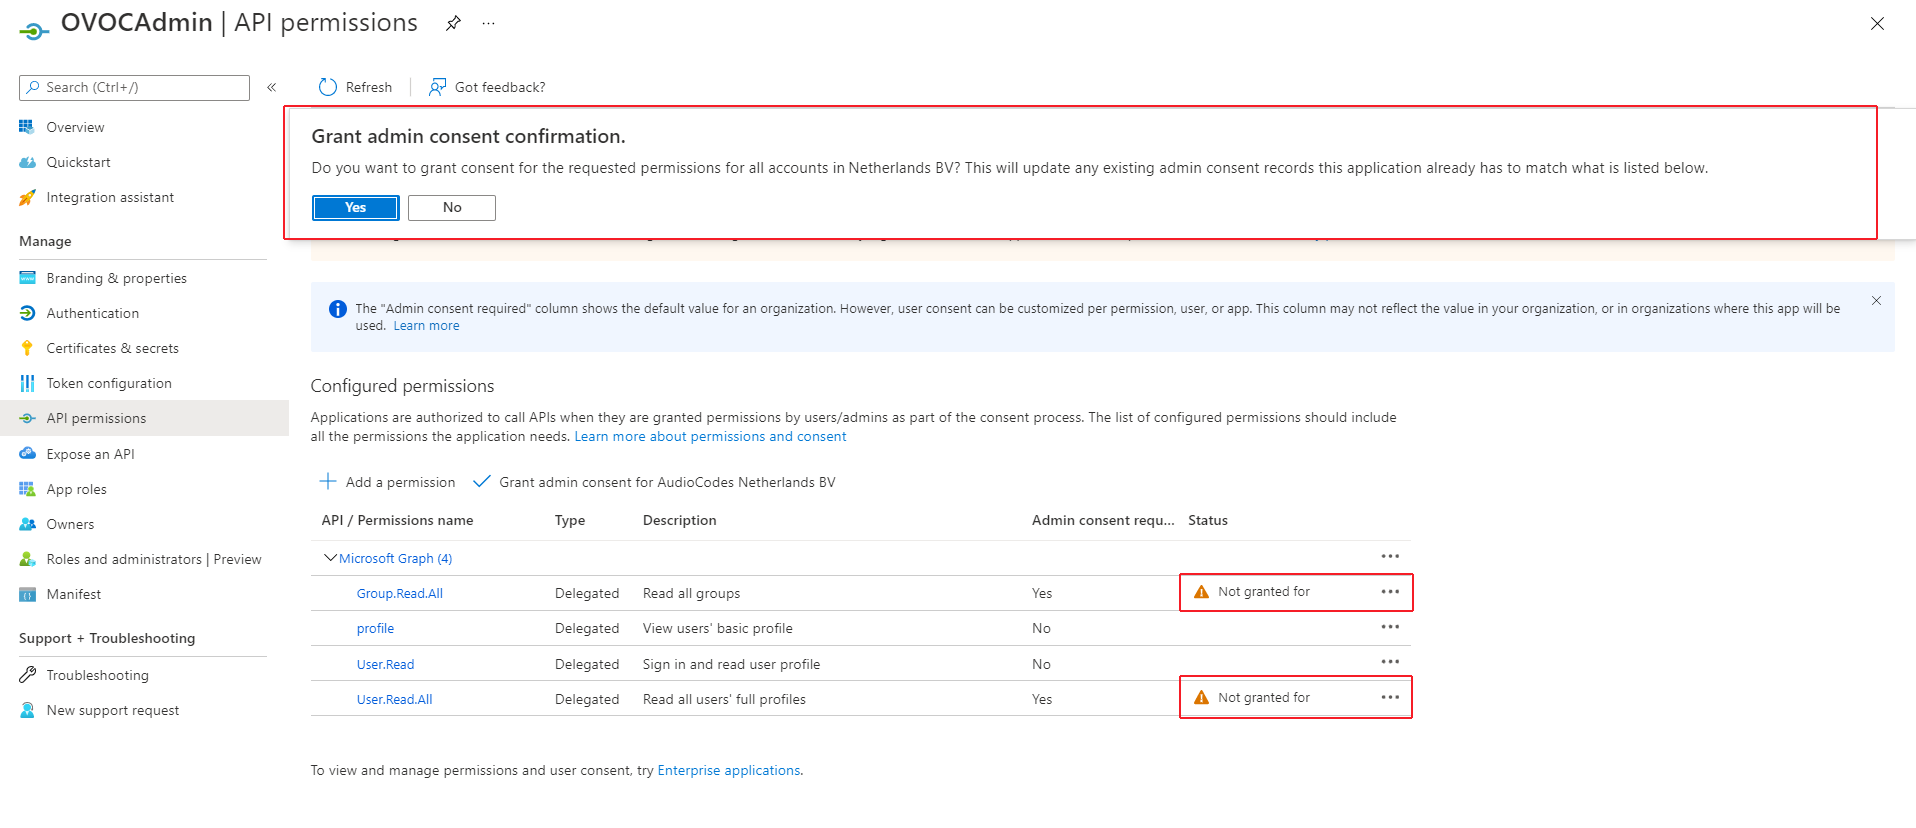
| 13. | Click Grant admin consent for <Tenant_Name> link to grant consent for the requested permissions for all accounts for this tenant, and then click Yes to confirm. |
Grant Admin Consent for all Accounts
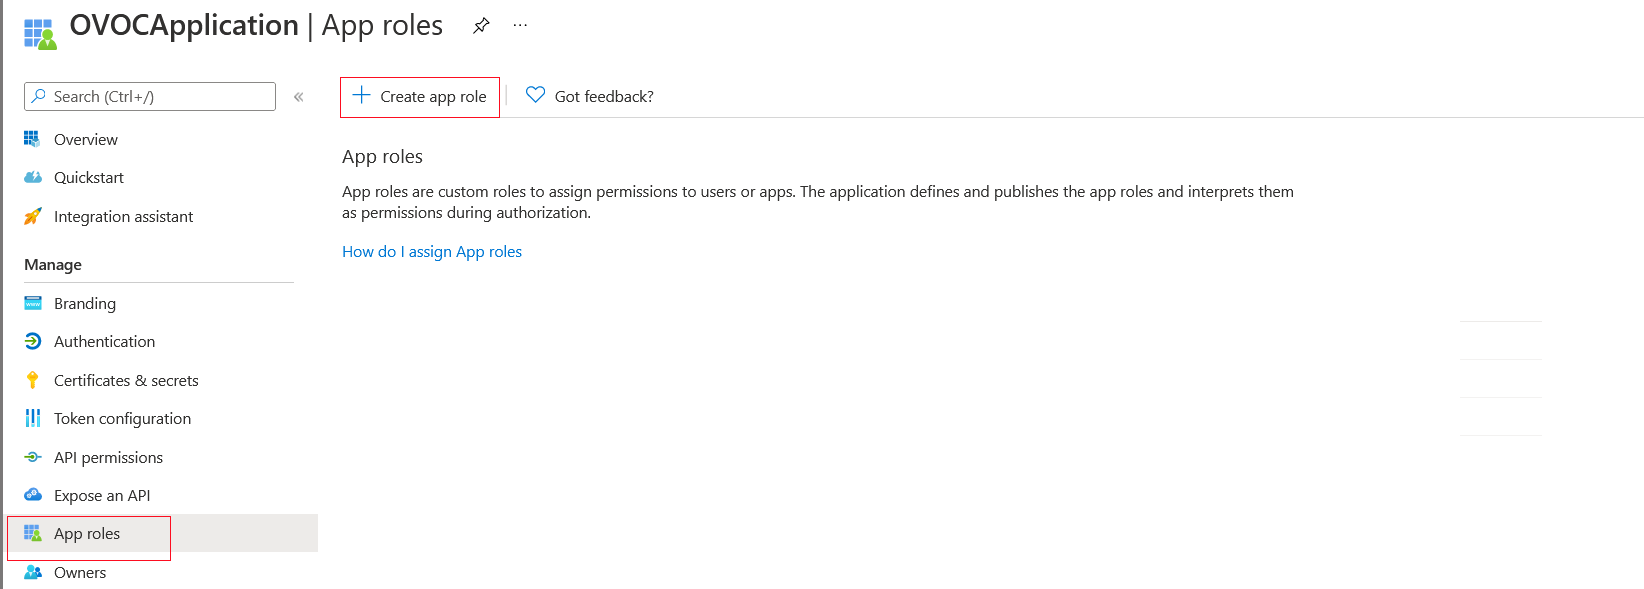
| 14. | In the Navigation pane, select App roles and then click Create app role. |
Create App Roles
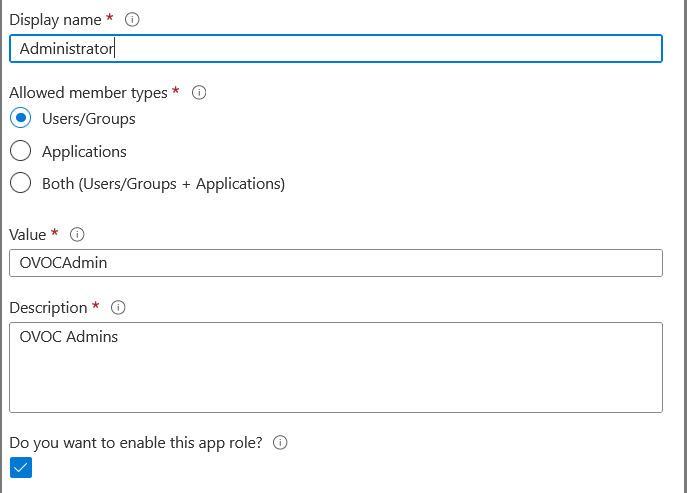
| 15. | Create an app role with Admin permissions: |
| a. | In the Display Name field, enter "Administrators" or "Admins" |
| b. | Select Users/Groups check box |
| c. | Enter value "OVOCAdmin" |
| d. | Select the do you want to enable this app role check box. |
| e. | Click Apply |
Admin Role
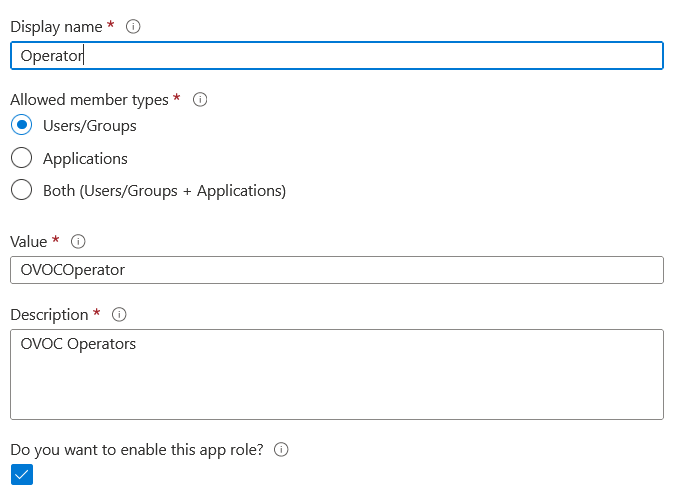
| 16. | Repeat the above steps to create an App role with Operator permissions with value 'OVOCOperator". |
Operator Role
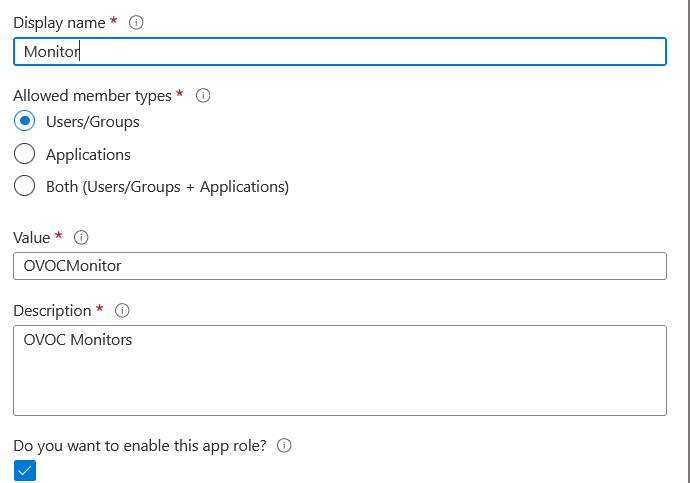
| 17. | Repeat the steps described for creating "Admin" role above to create an app role with Monitor permissions with value "OVOCMonitor". |
Operator Role
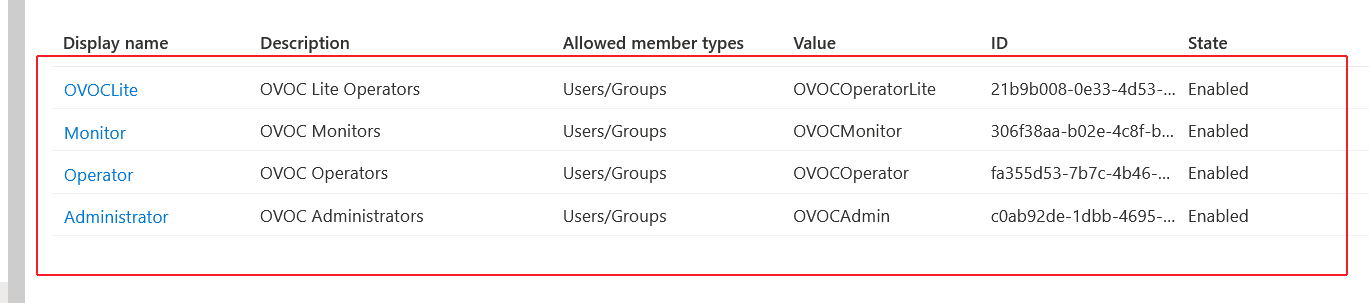
The new roles are displayed:
App roles Configured
| 18. | In the Navigation pane, select the Overview page for the application. |
Overview Page

| 19. | Note the Directory (tenant) ID value as it must later be configured inConfiguring OVOC Web Azure Settings - Multitenant Upgrade |
| 20. | Add External tenant operators and assign roles as described in Add External Tenant Operators and Assign Roles |
| 21. | Configure Azure settings in OVOC Web as described in Configuring OVOC Web Azure Settings - Multitenant Upgrade |